We’ll start with ChatGPT to generate our data. We can be very specific, asking for a table and specific formatting in each column.
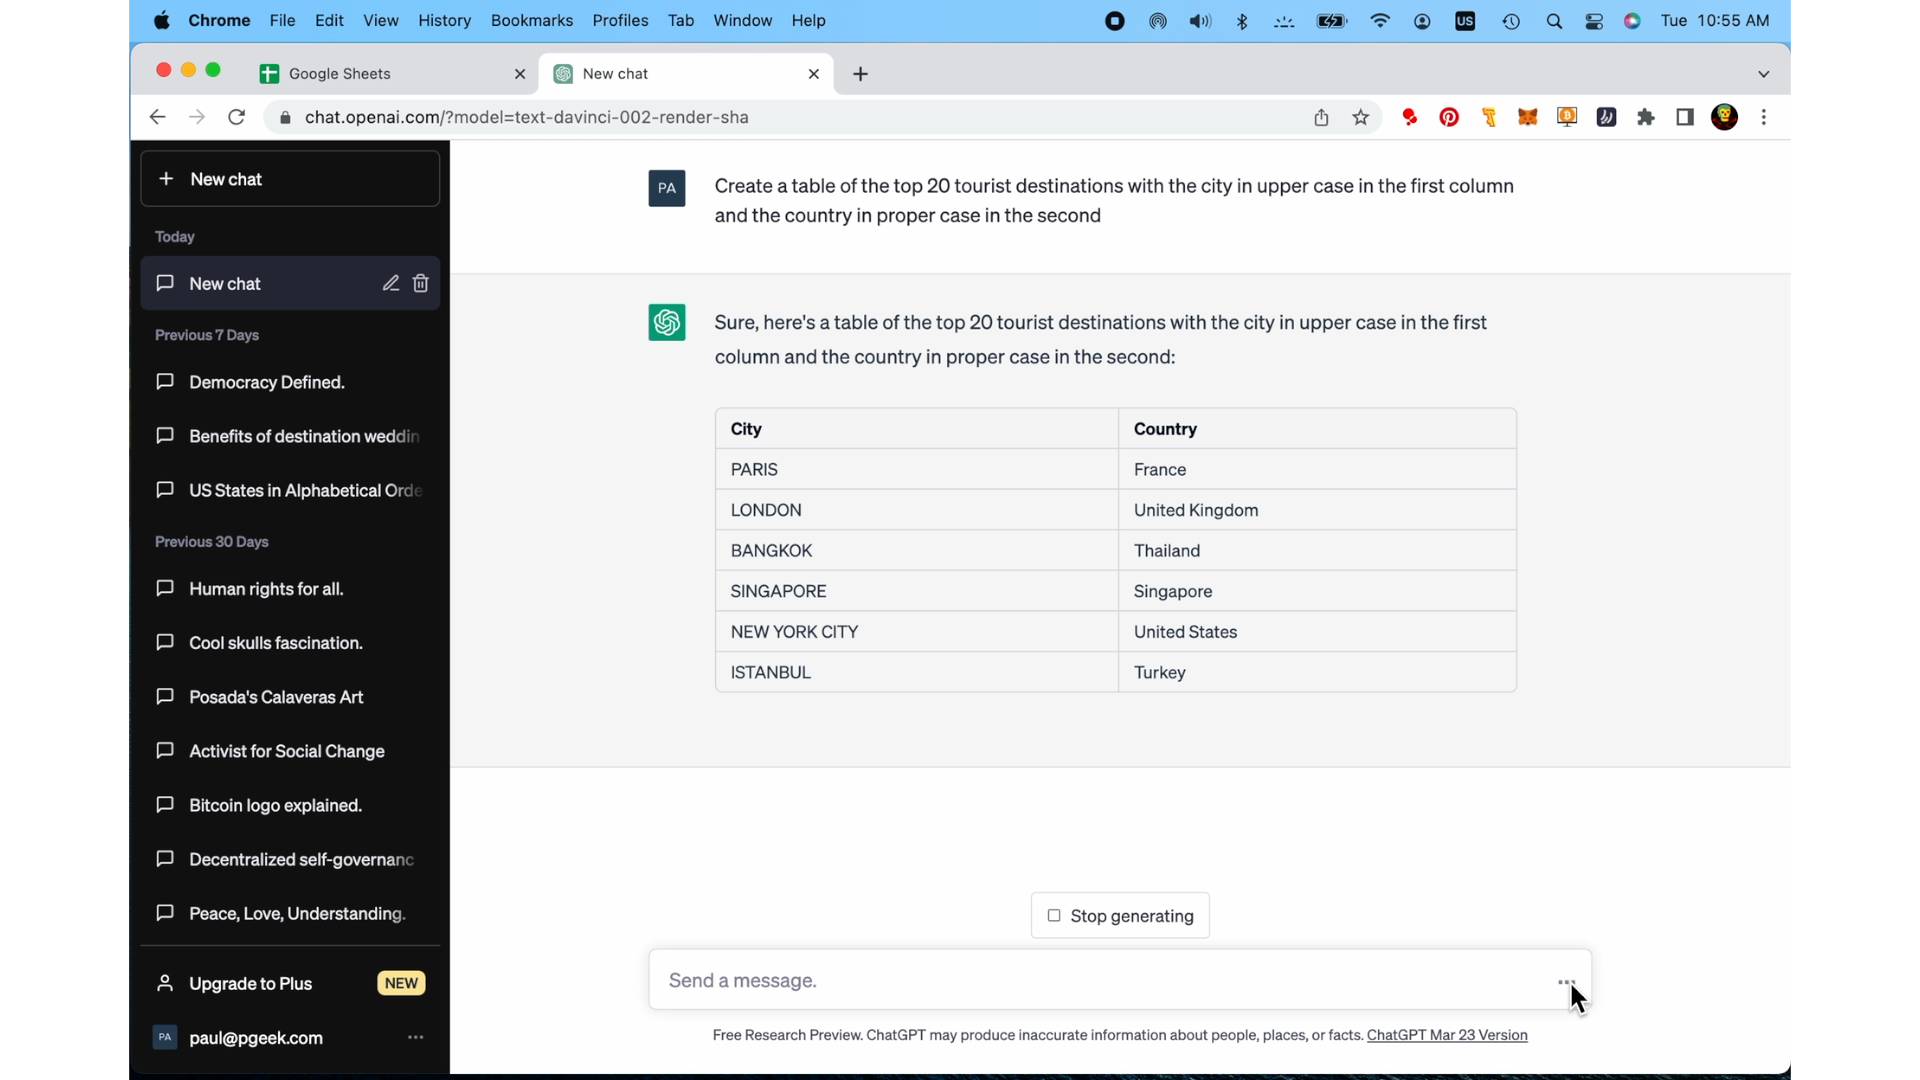
Copy and paste the table from ChatGPT
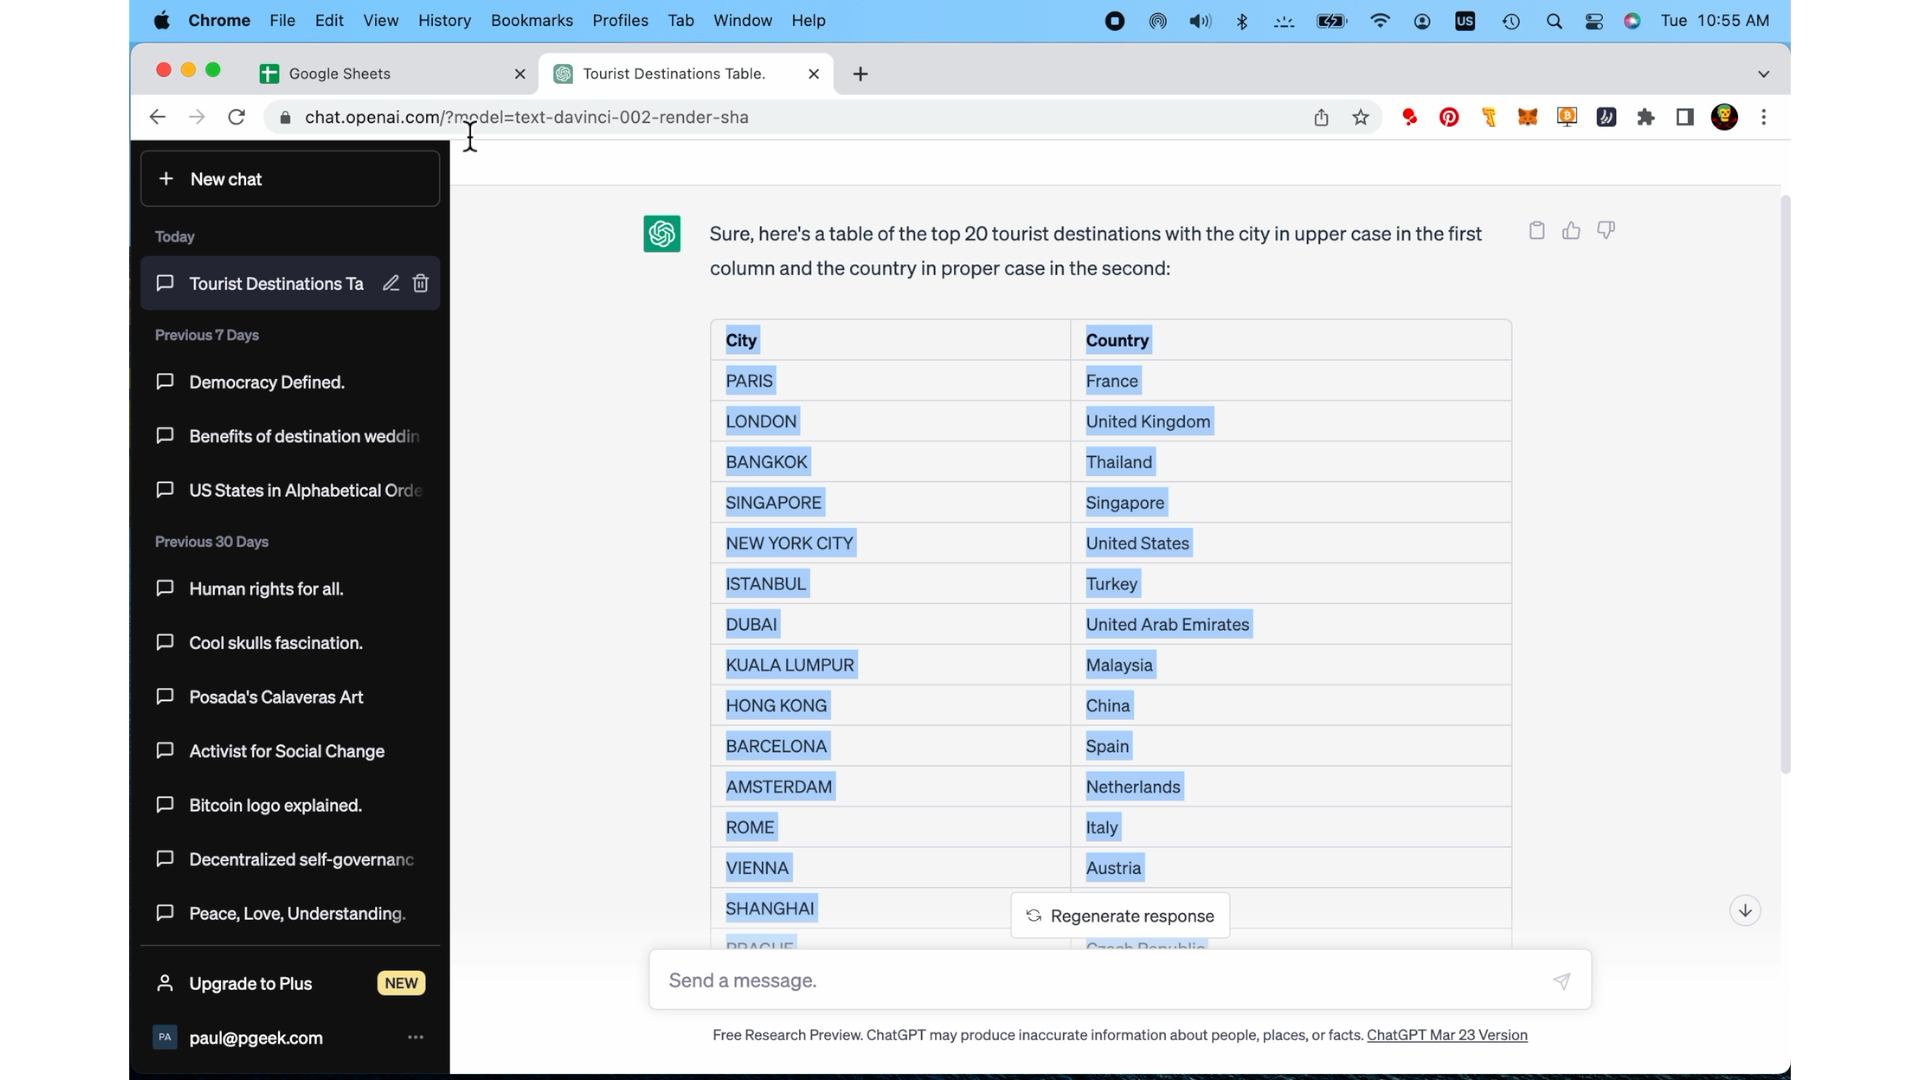
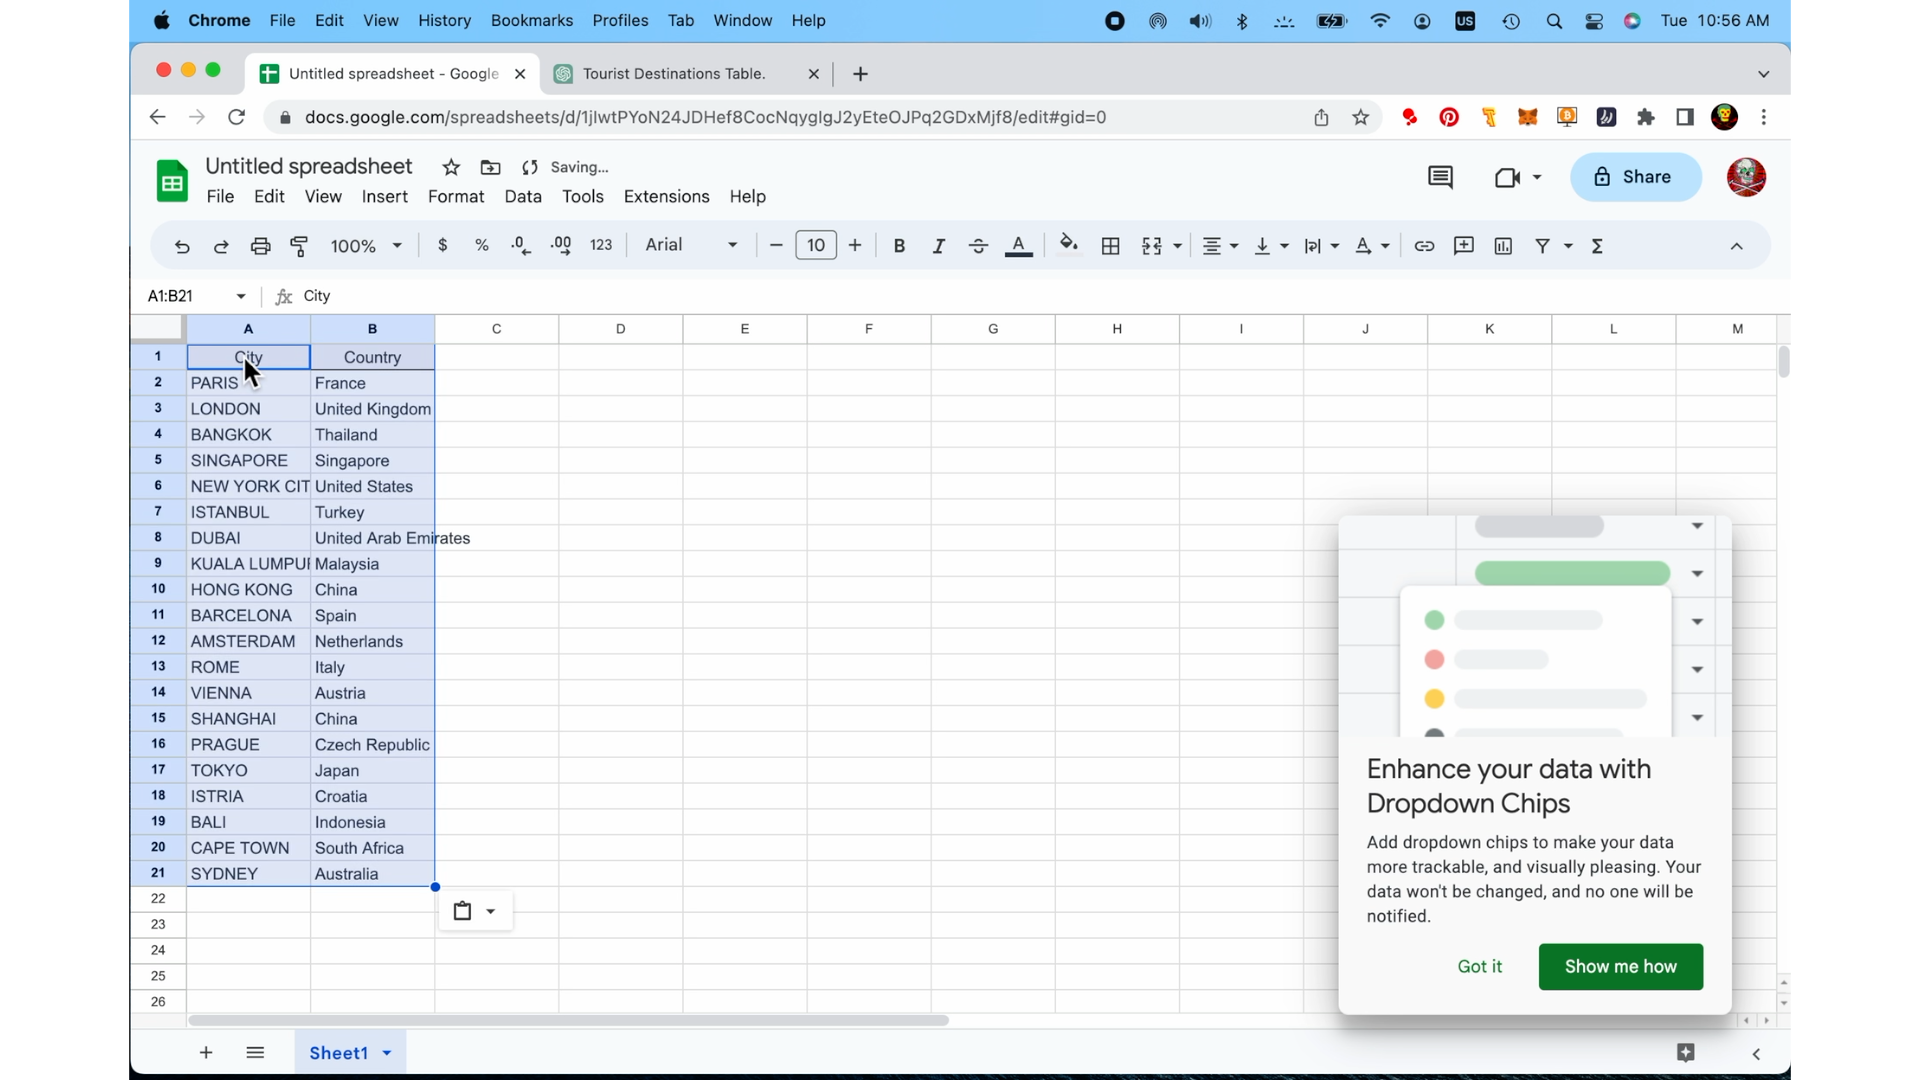
paste into the first cell in the upper left (under the cursor) of a new Google Sheet. Make a note of the column header in row number 1. “City” and “Country” These must match exactly in Photoshop.
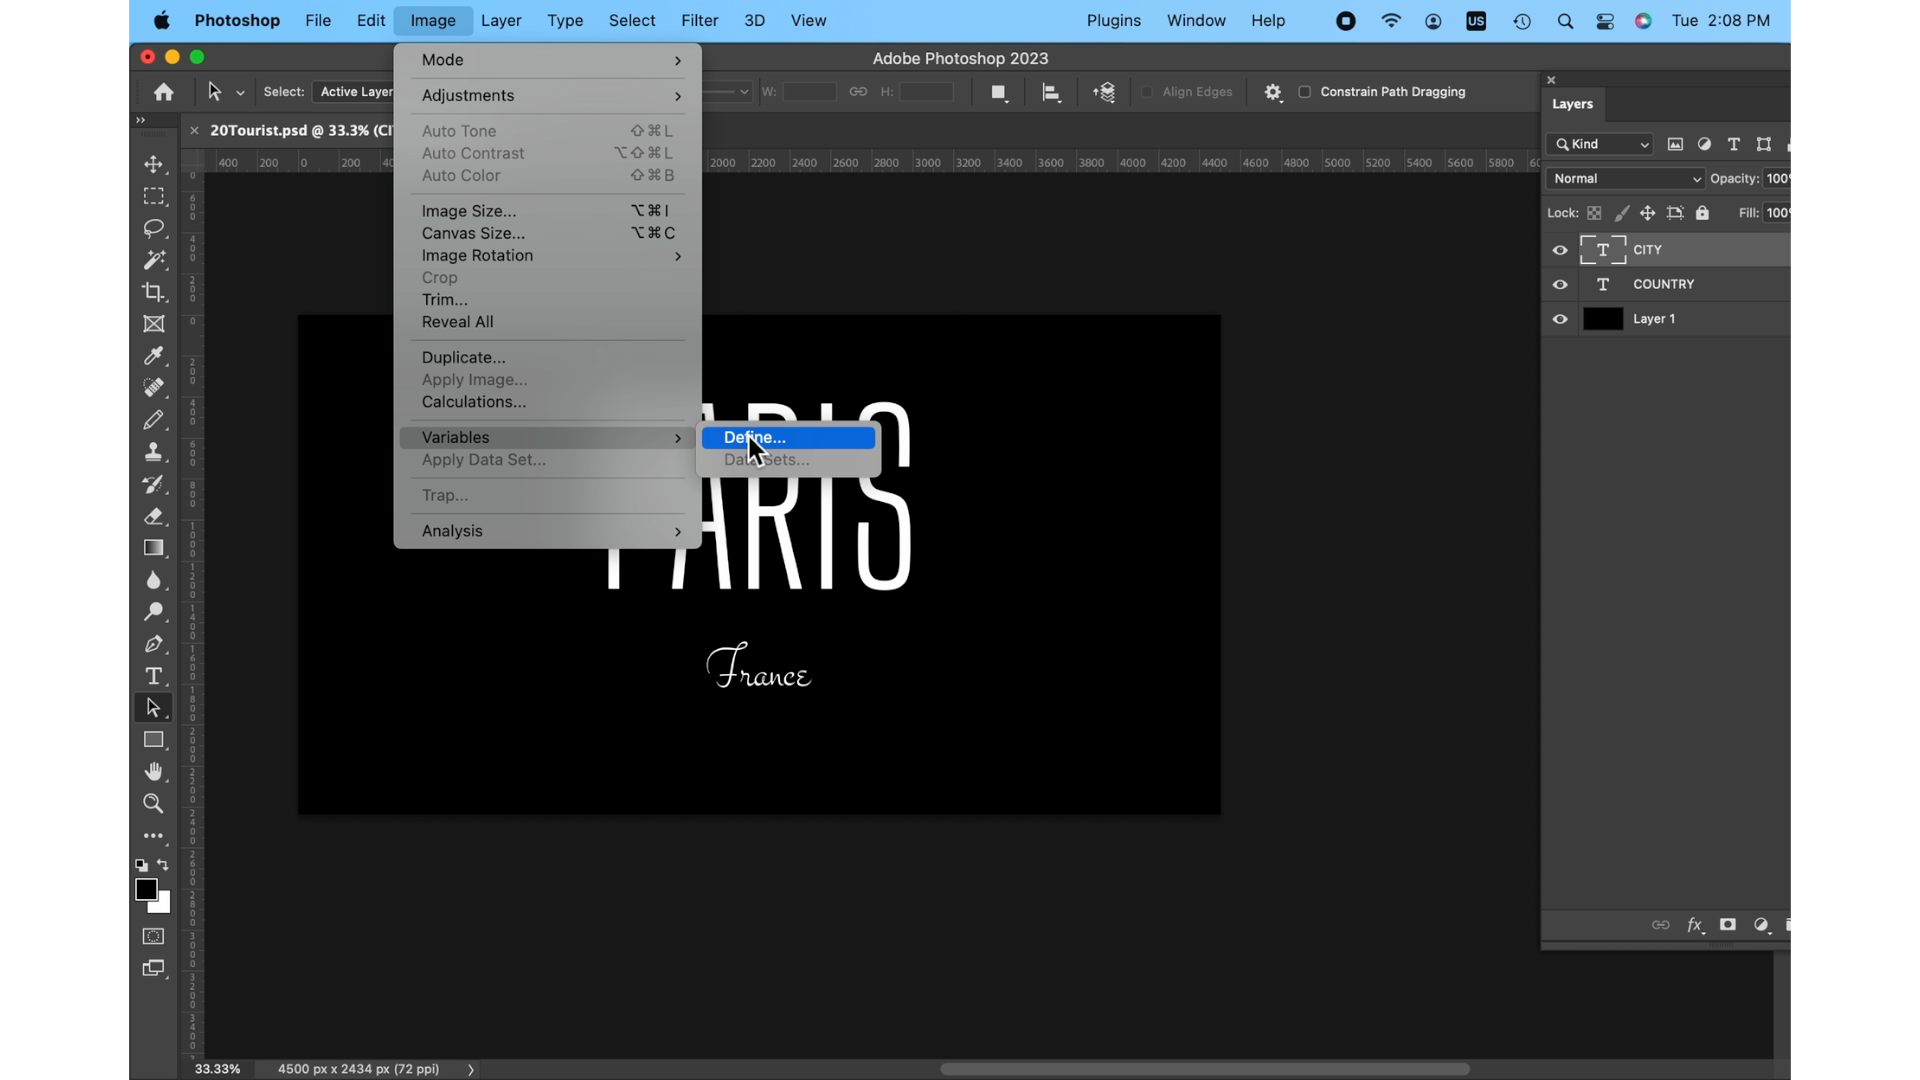
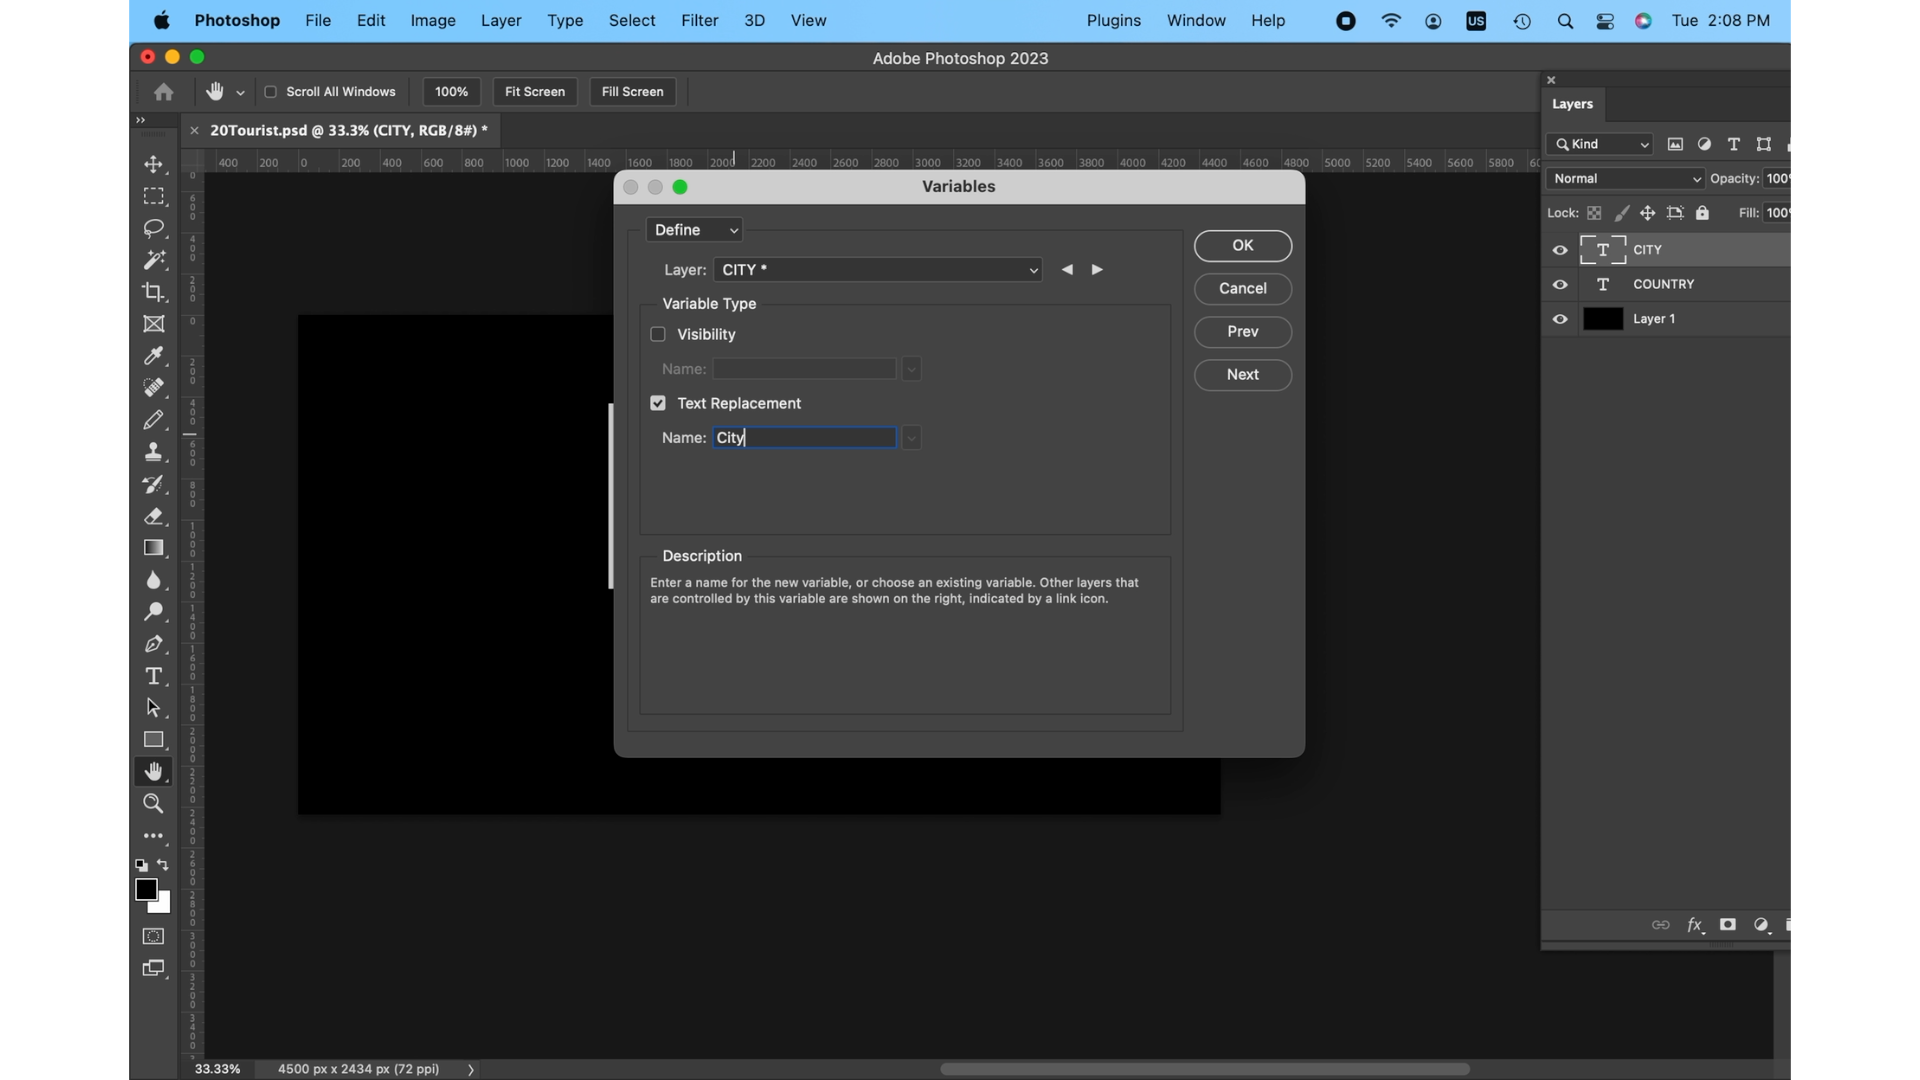
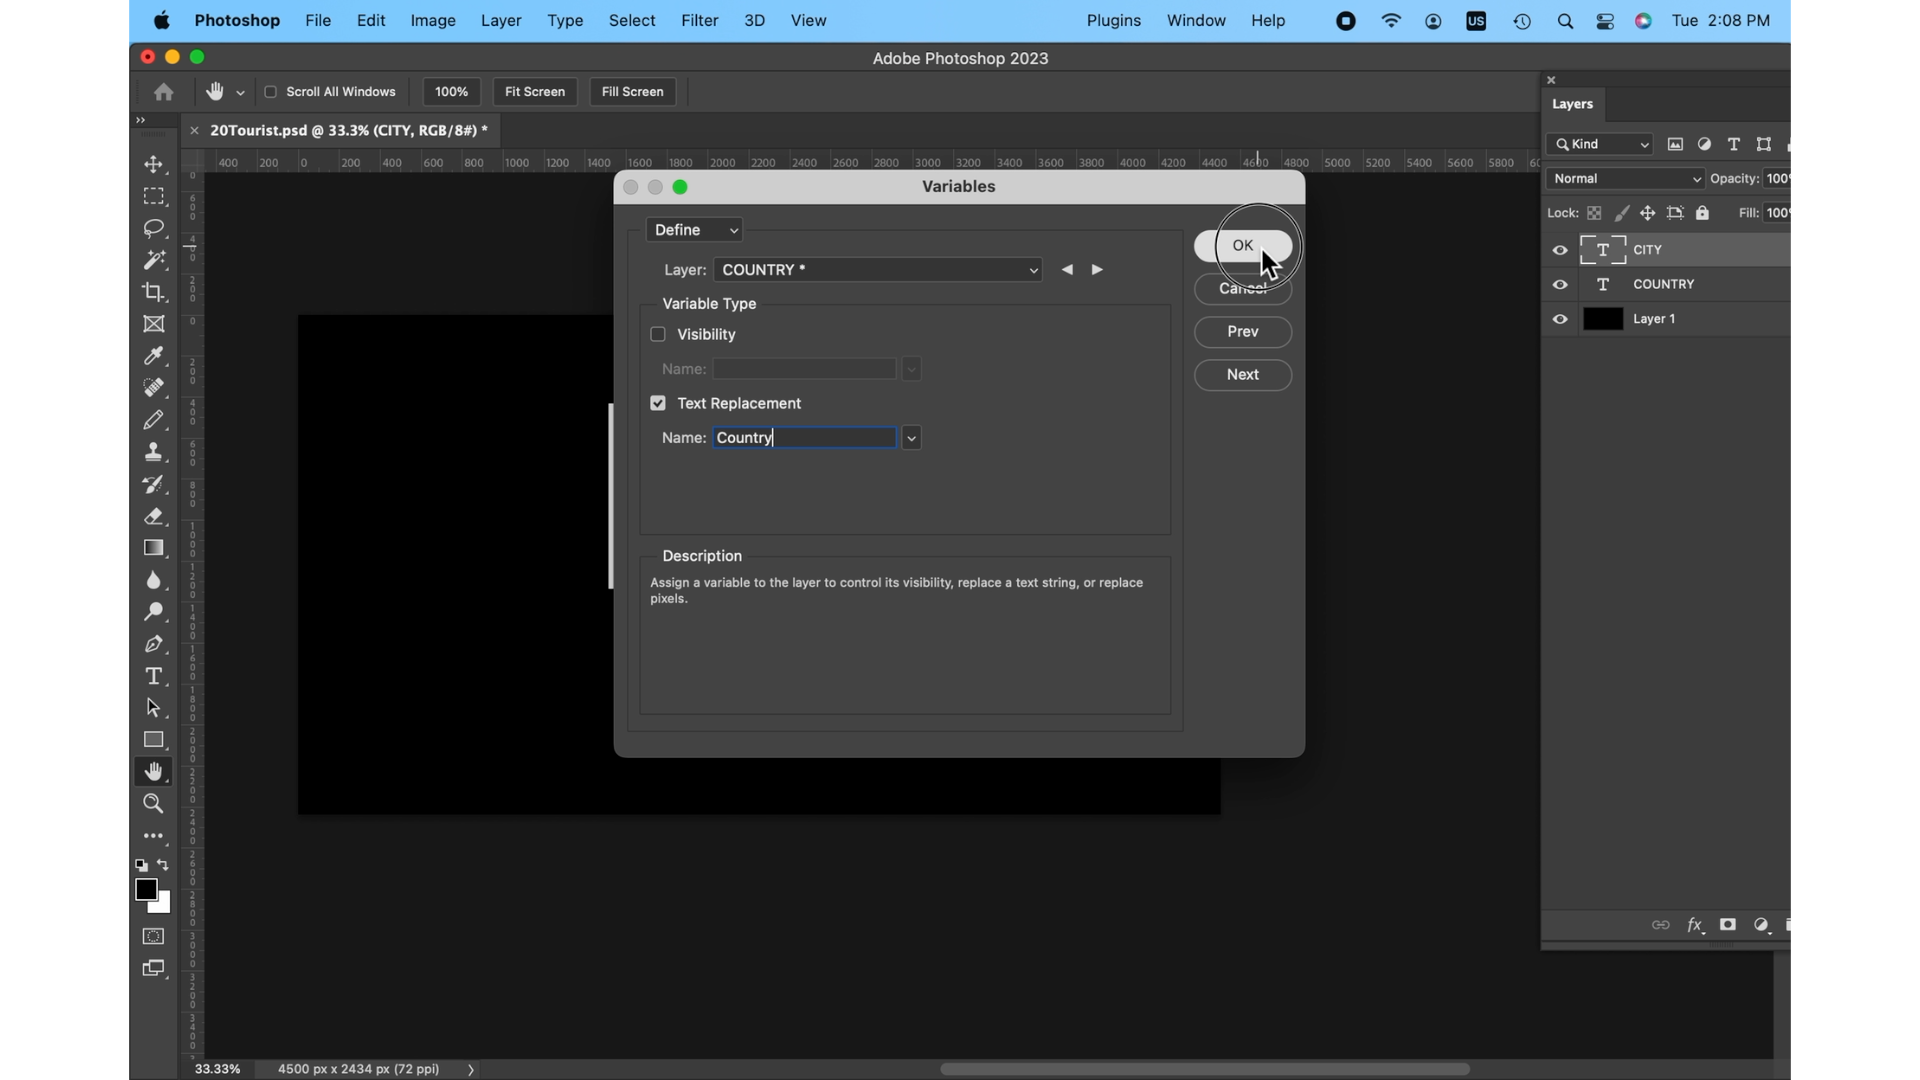
Download the .csv file. This is my template in Photoshop. It has a background color (Black) and a layer of white type (COUNTRY) and another layer of white type (CITY). Go to Image > Variables > Define
Make sure these all match.
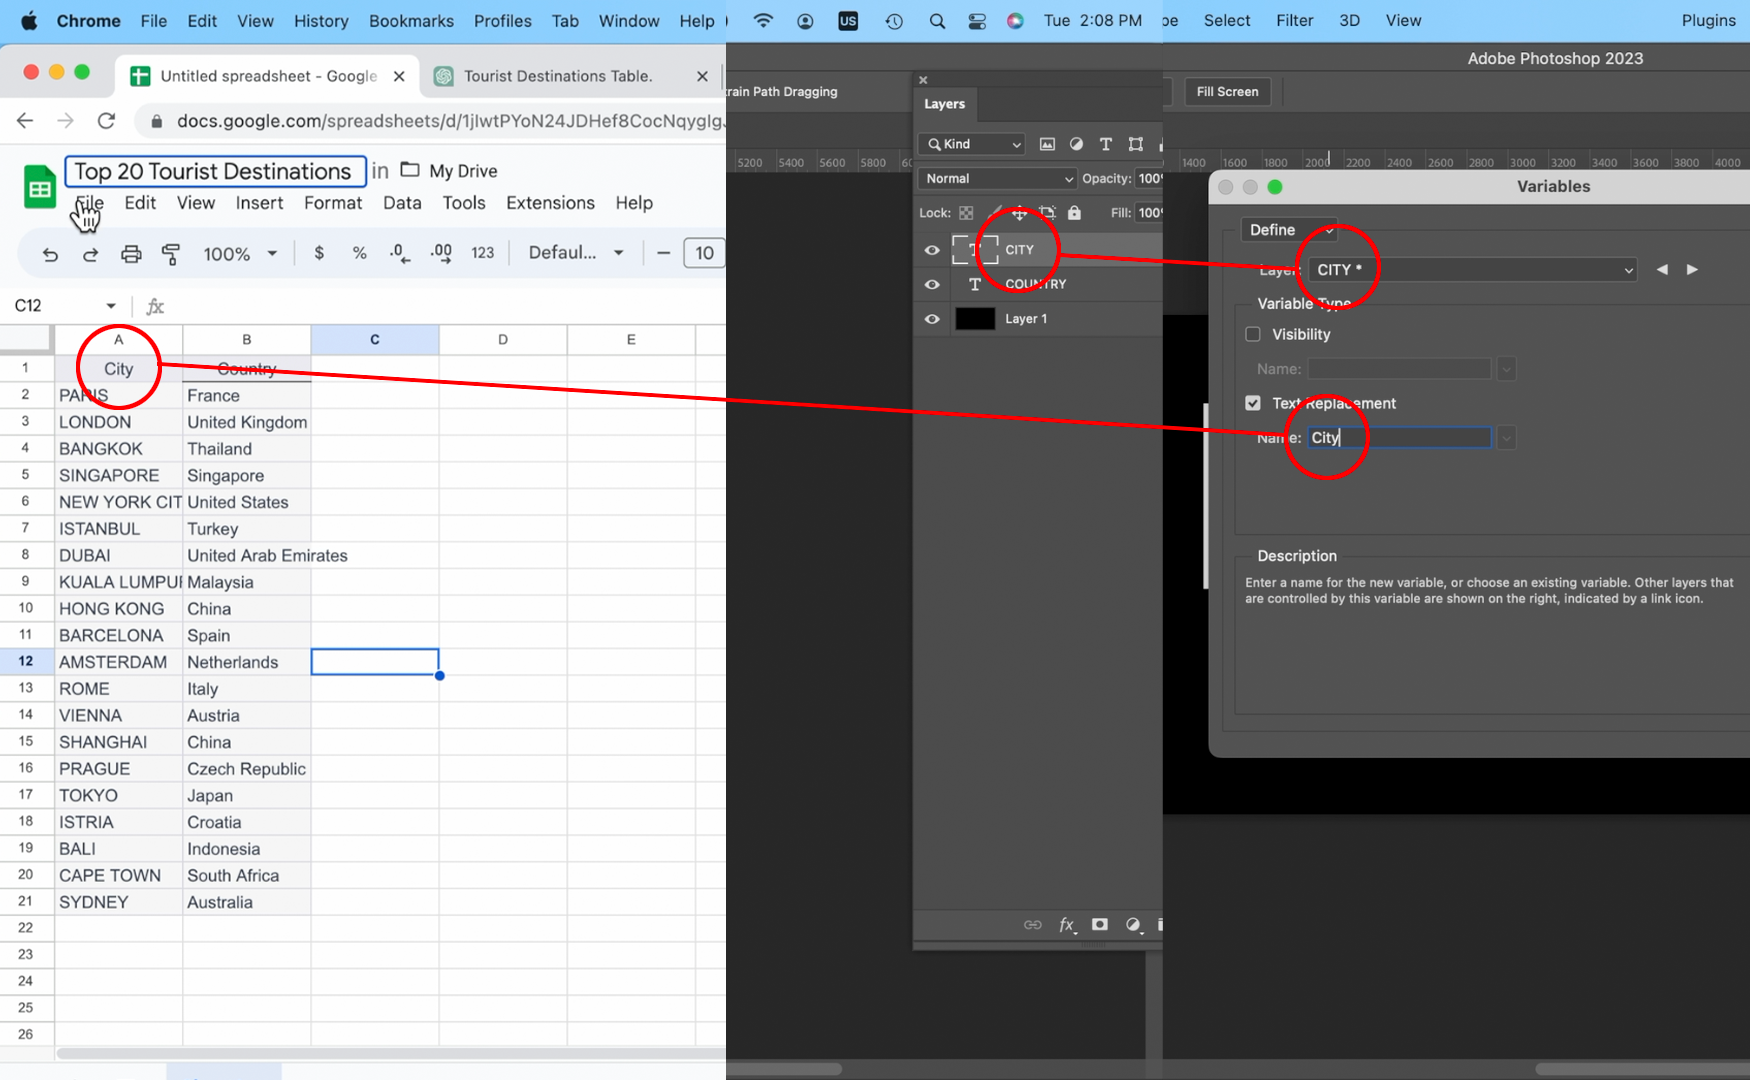
Select the type layer CITY, check “Text Replacement” and in Name: put the header of the Google Sheets column (City) that will populate the Photoshop layer (CITY). Do the same for the second layer (COUNTRY,Country) and click OK.
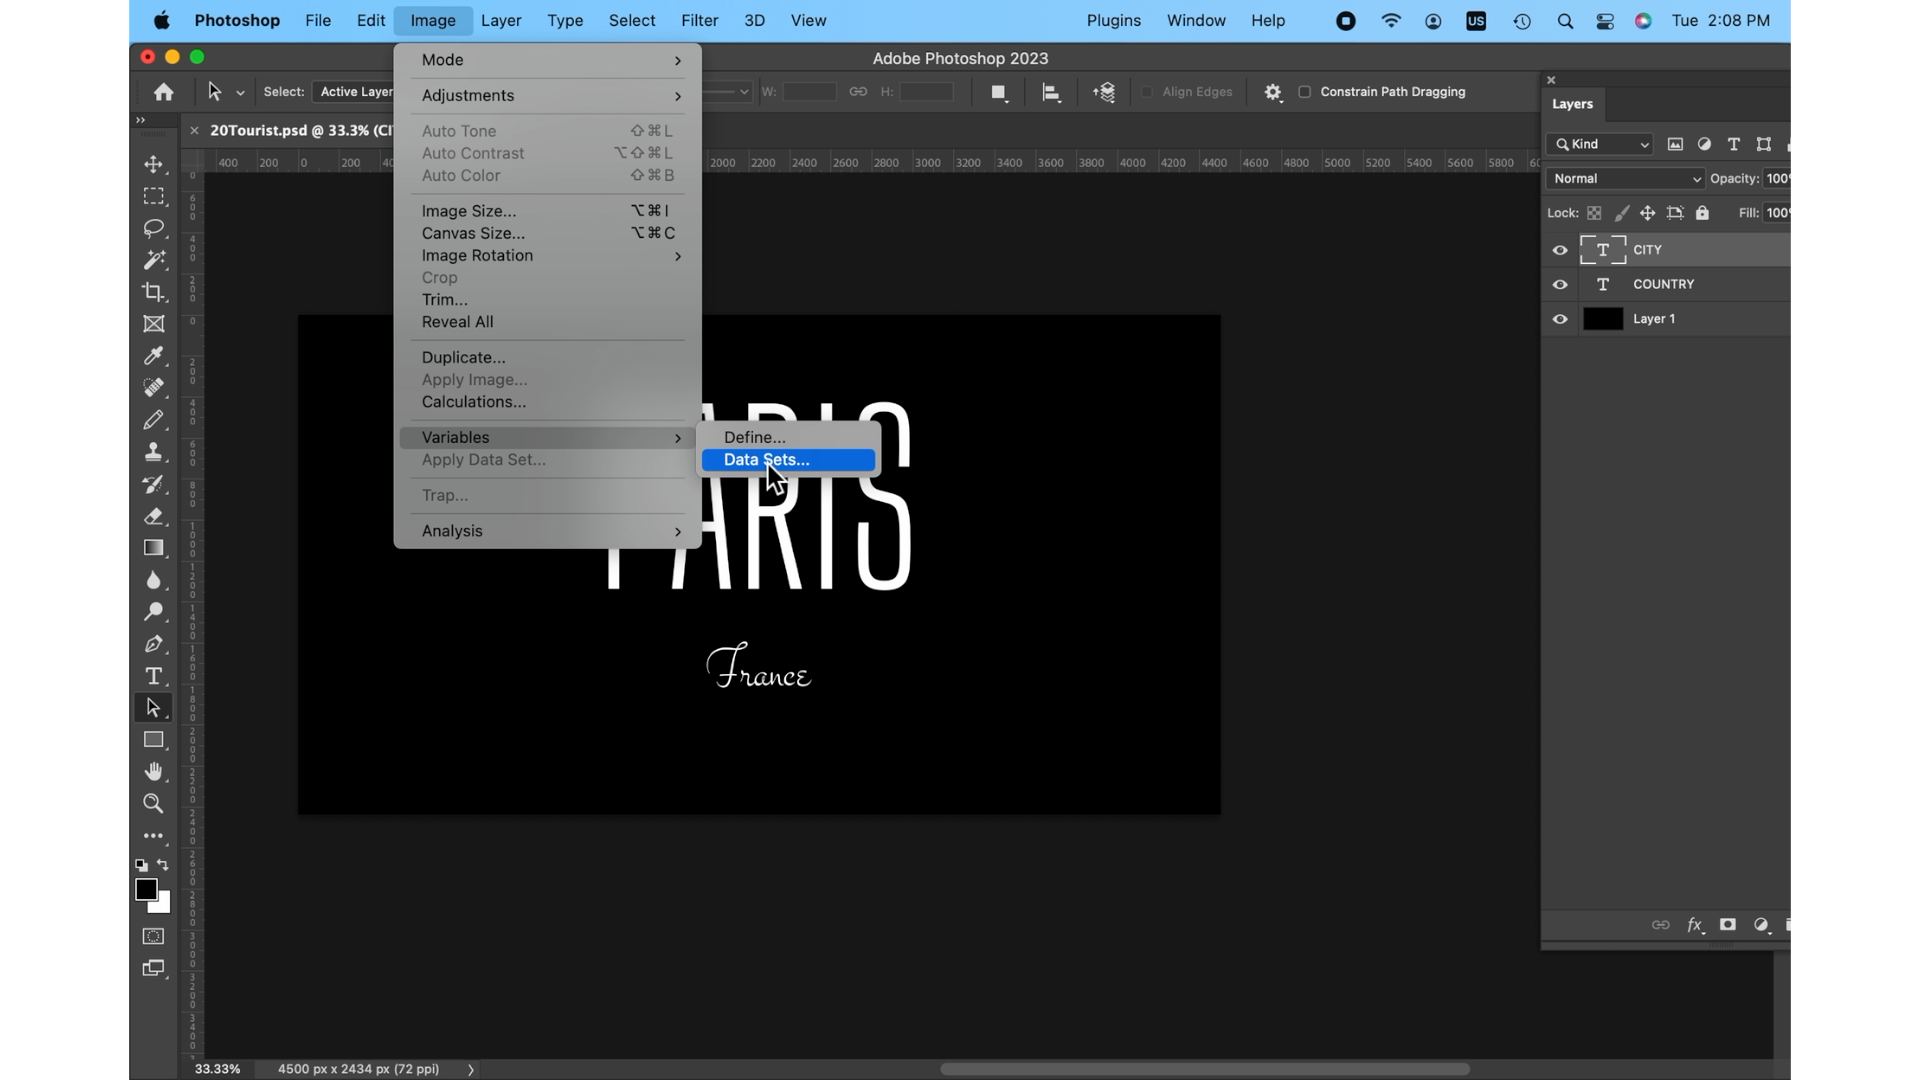
Next go to Image > Variables > Data Sets
Click Import and select the .csv file that you just downloaded from Google Sheets. Be sure that “Use First Column For Data Set Names” is checked.
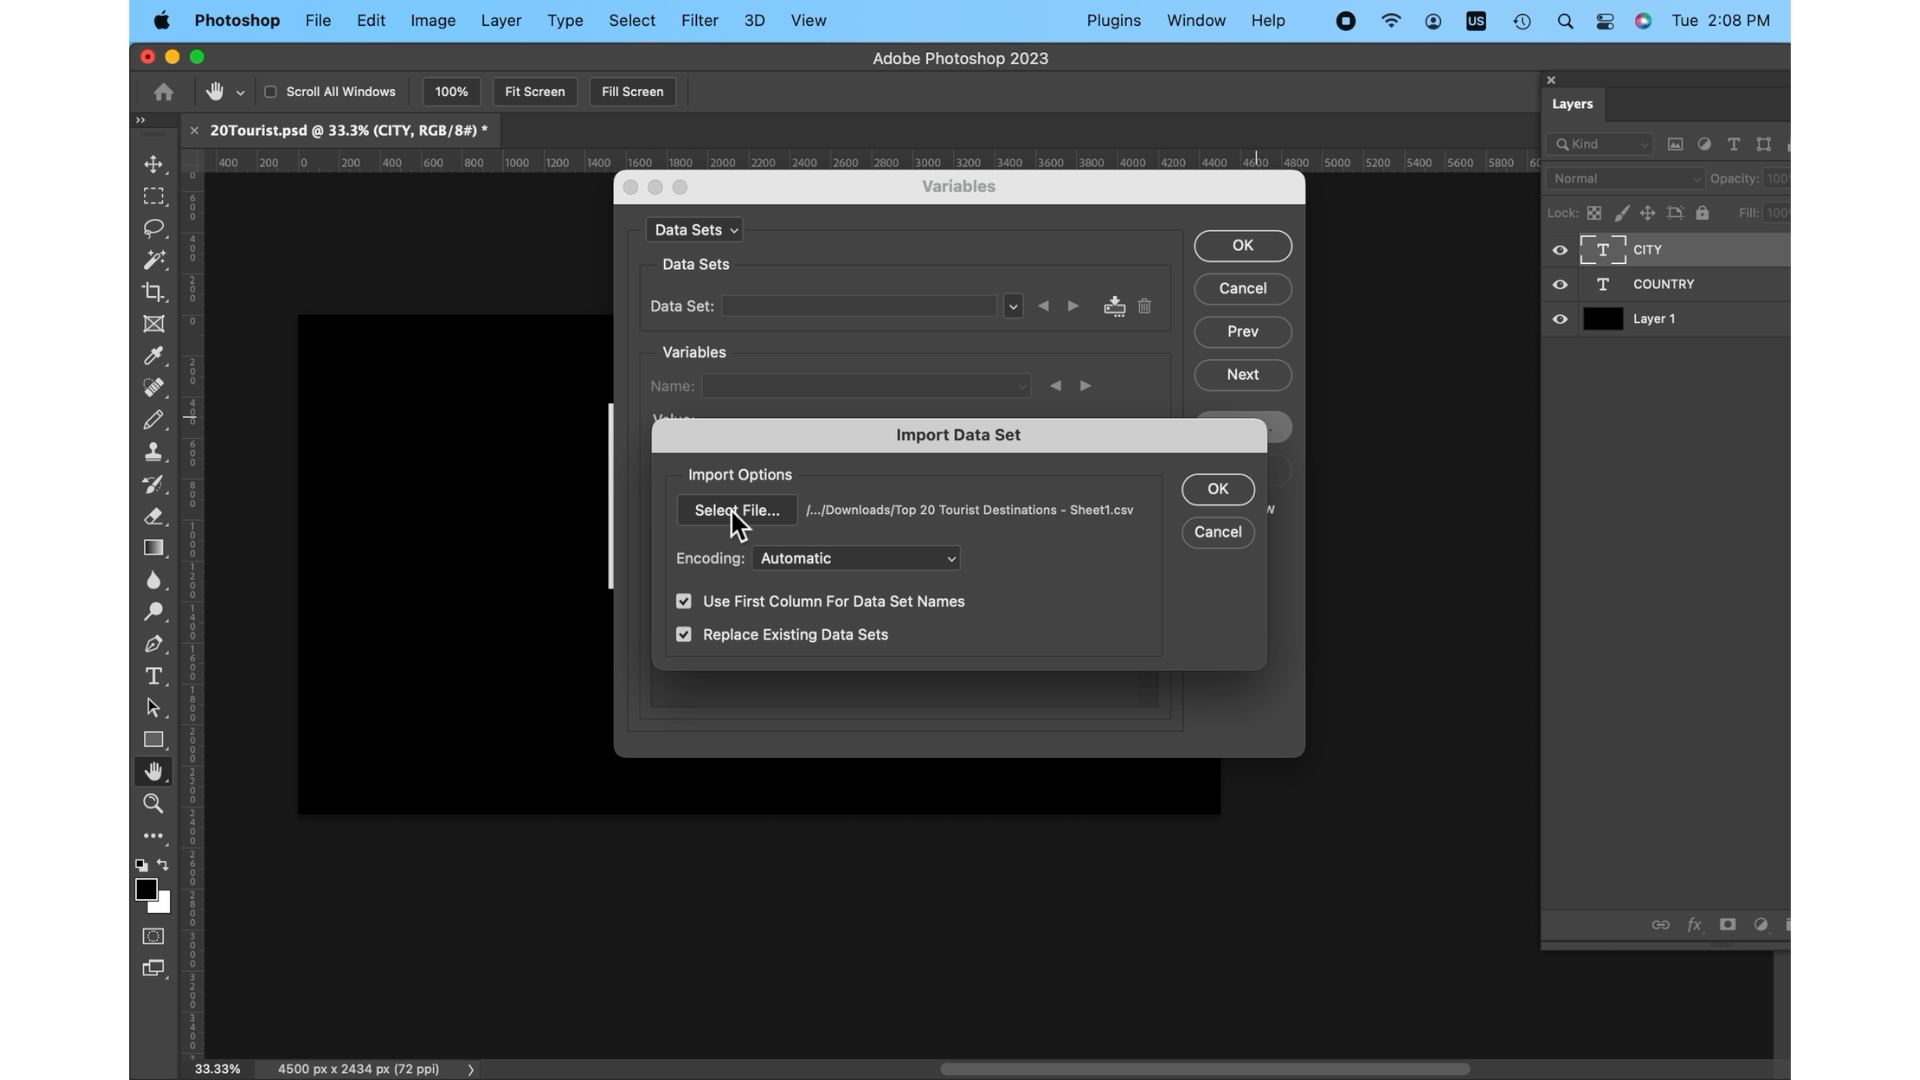
If your .csv file doesn’t import, check that the Layers (Photoshop) and column headers (Google Sheets) are exactly the same (no extra columns).
With “Preview” checked on the right side you can scroll through the data set and see how everything will render by using the arrows next to “Data Set”
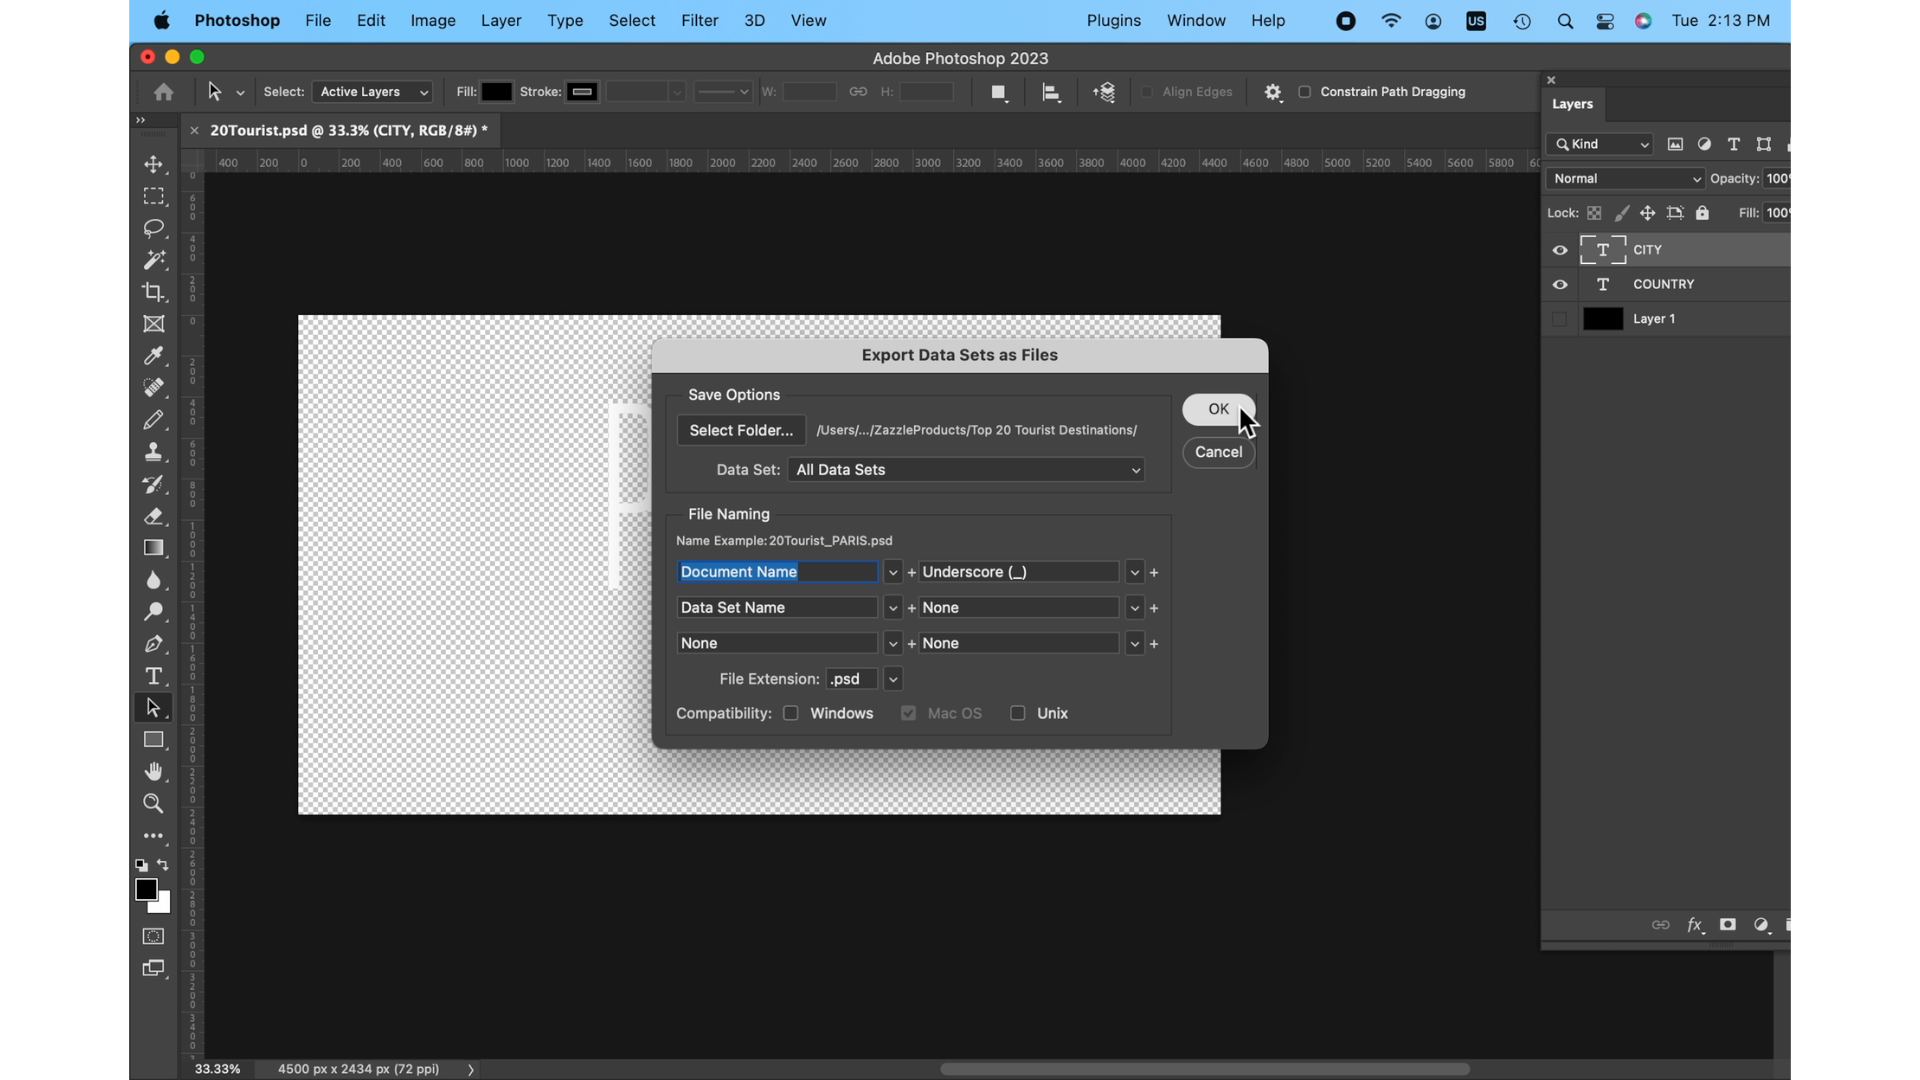
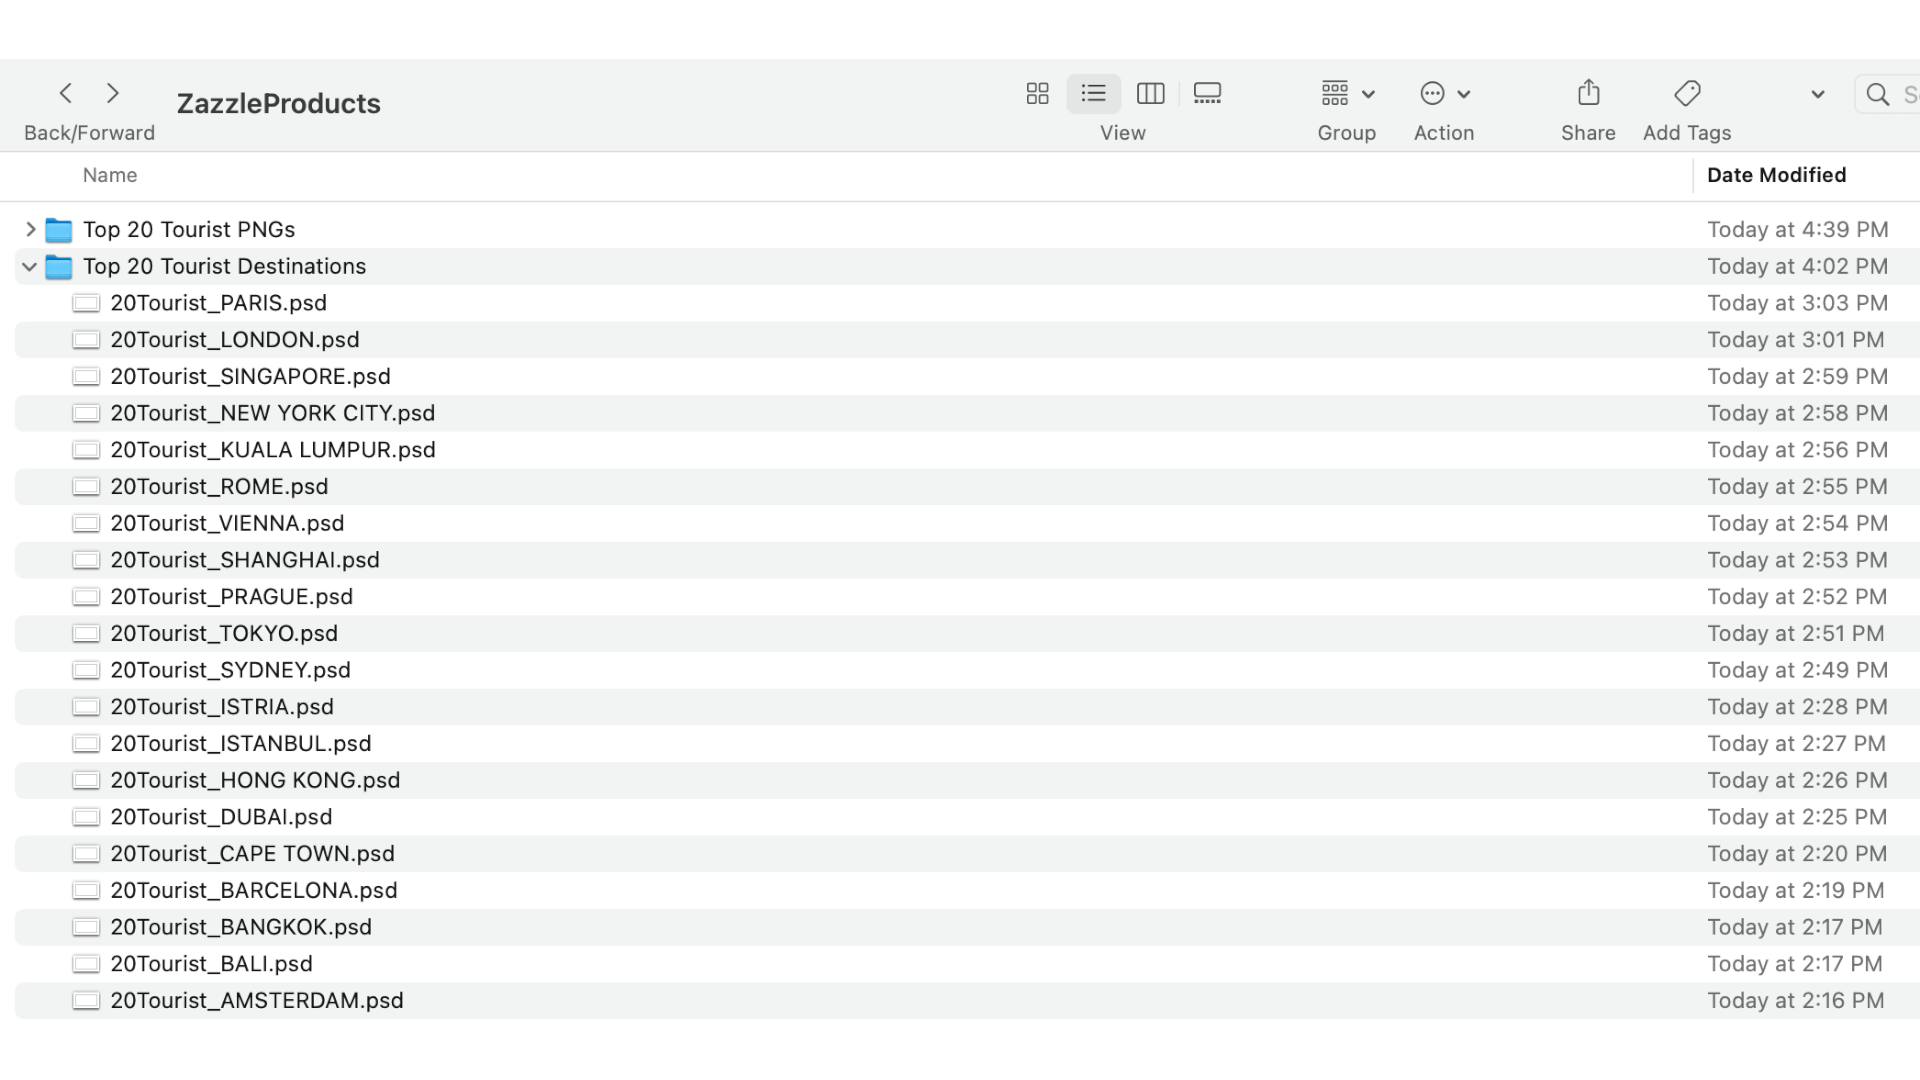
I deselected the background layer to get transparent PNGs and went to File > Export > Data Sets as Files

Select a Folder to send the .psd files to, click OK.
You’ll have a folder of .psd files.
The final step is to batch process these with a Photoshop Action into PNG files. We’ll create the Action called “PNG it”
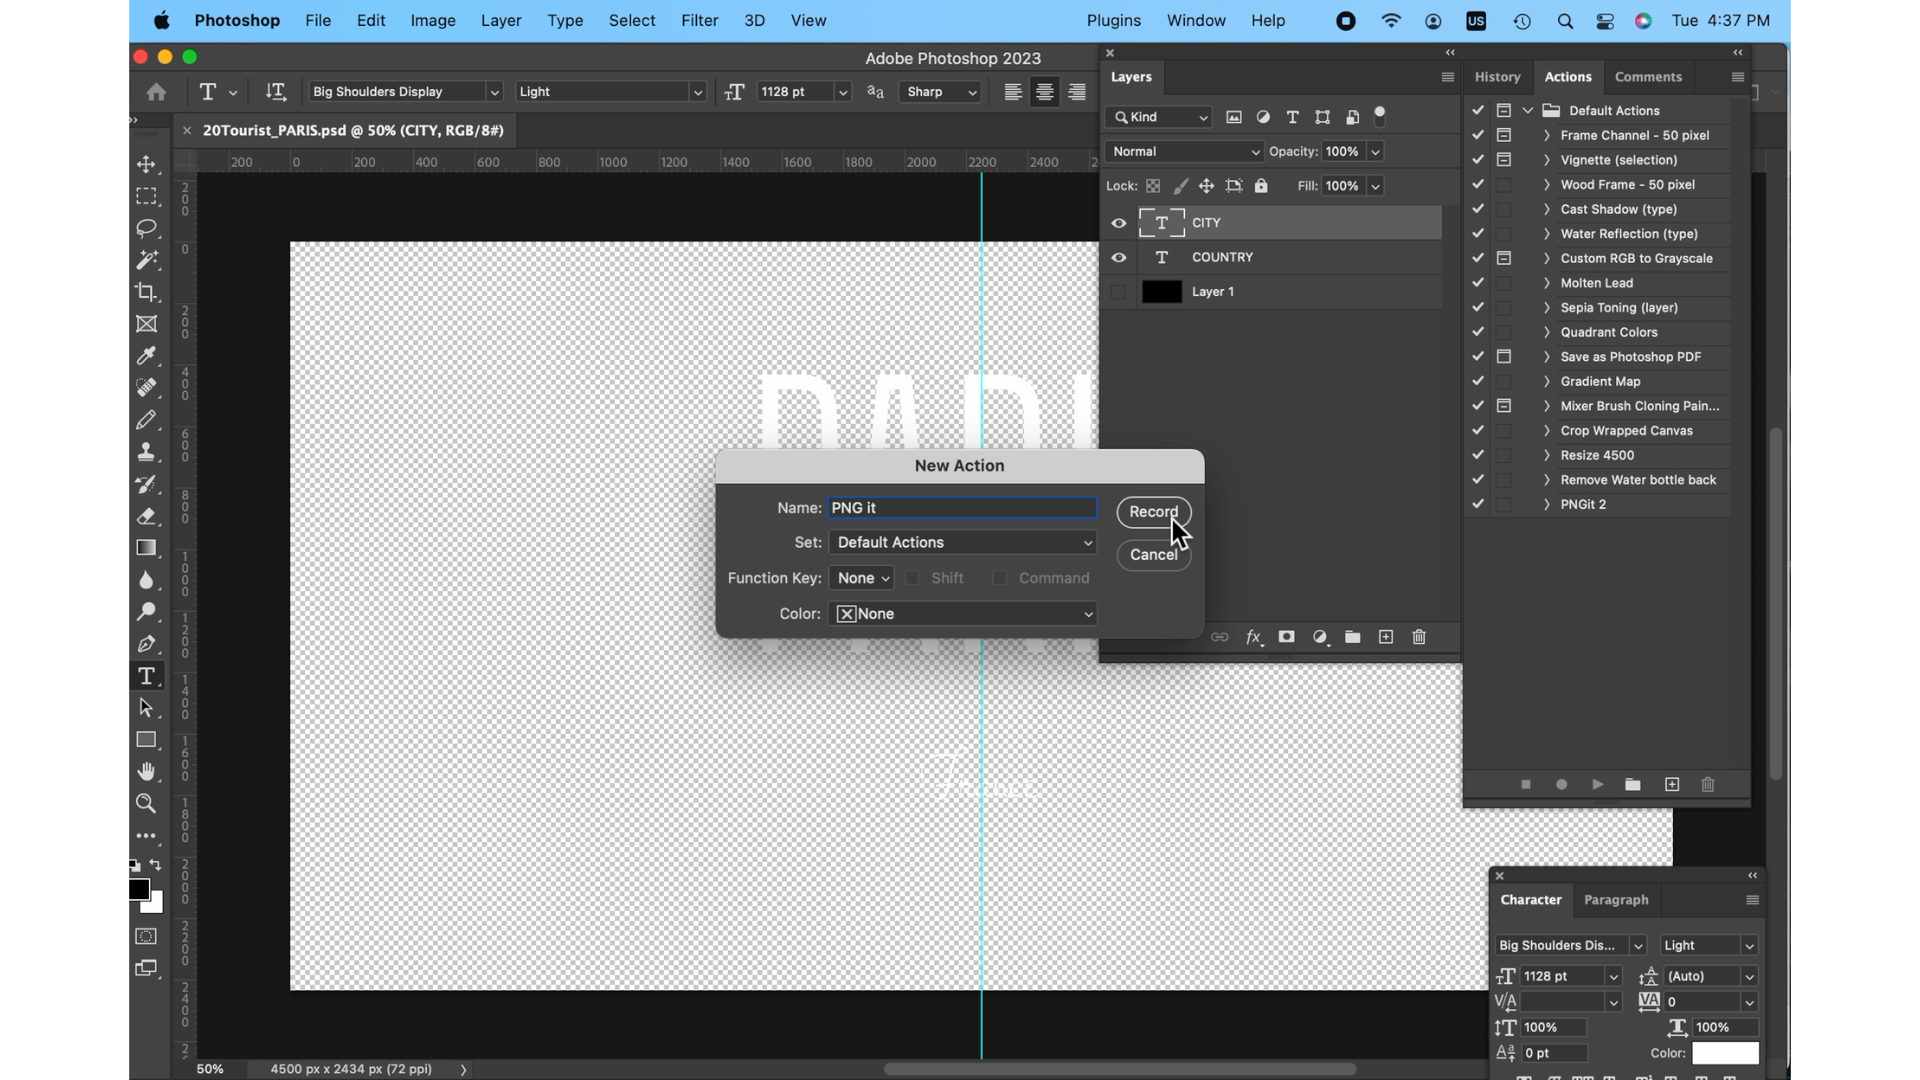
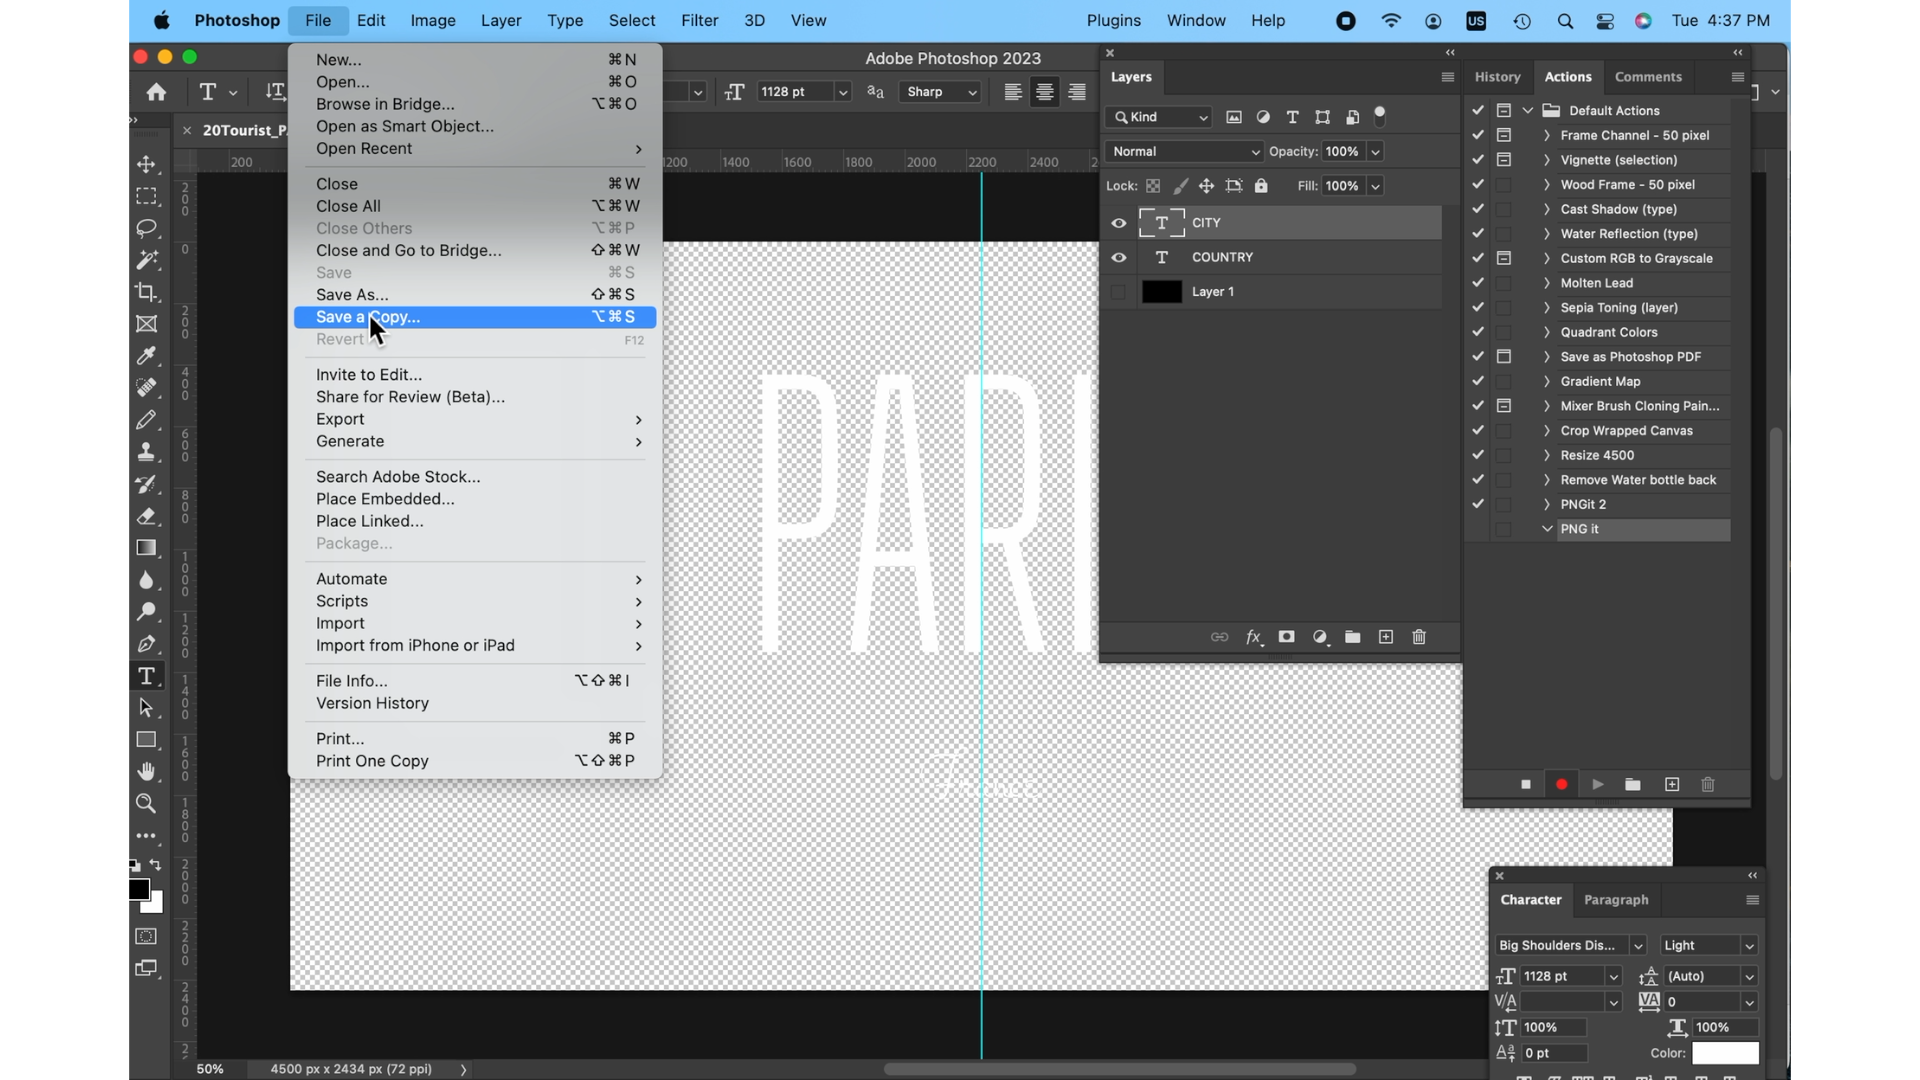
The only thing in this action is this “Save a Copy”
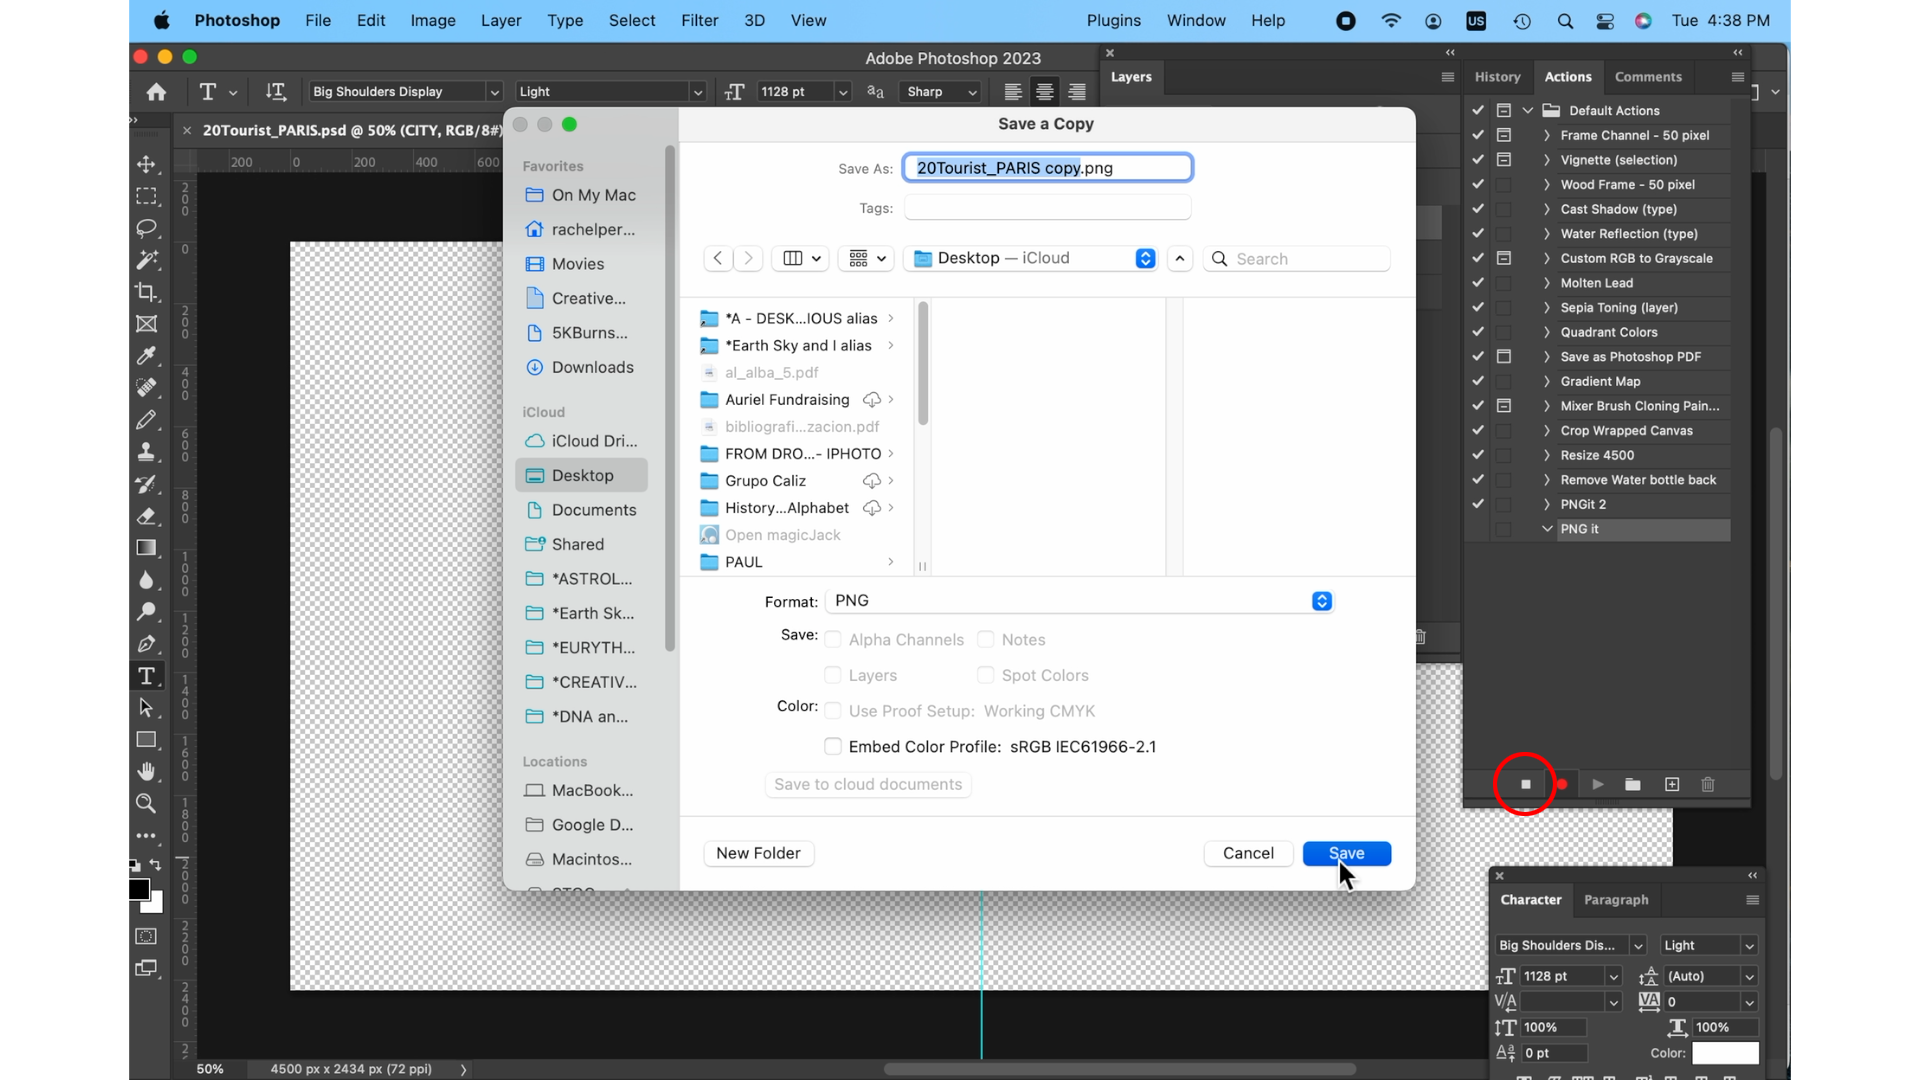
Save as PNG, I saved to the desktop because I’ll delete it later. It doesn’t matter, the folder to save to will be designated next in the batch process. Save and press stop on the action.
Close this file and go to File > Automate > Batch
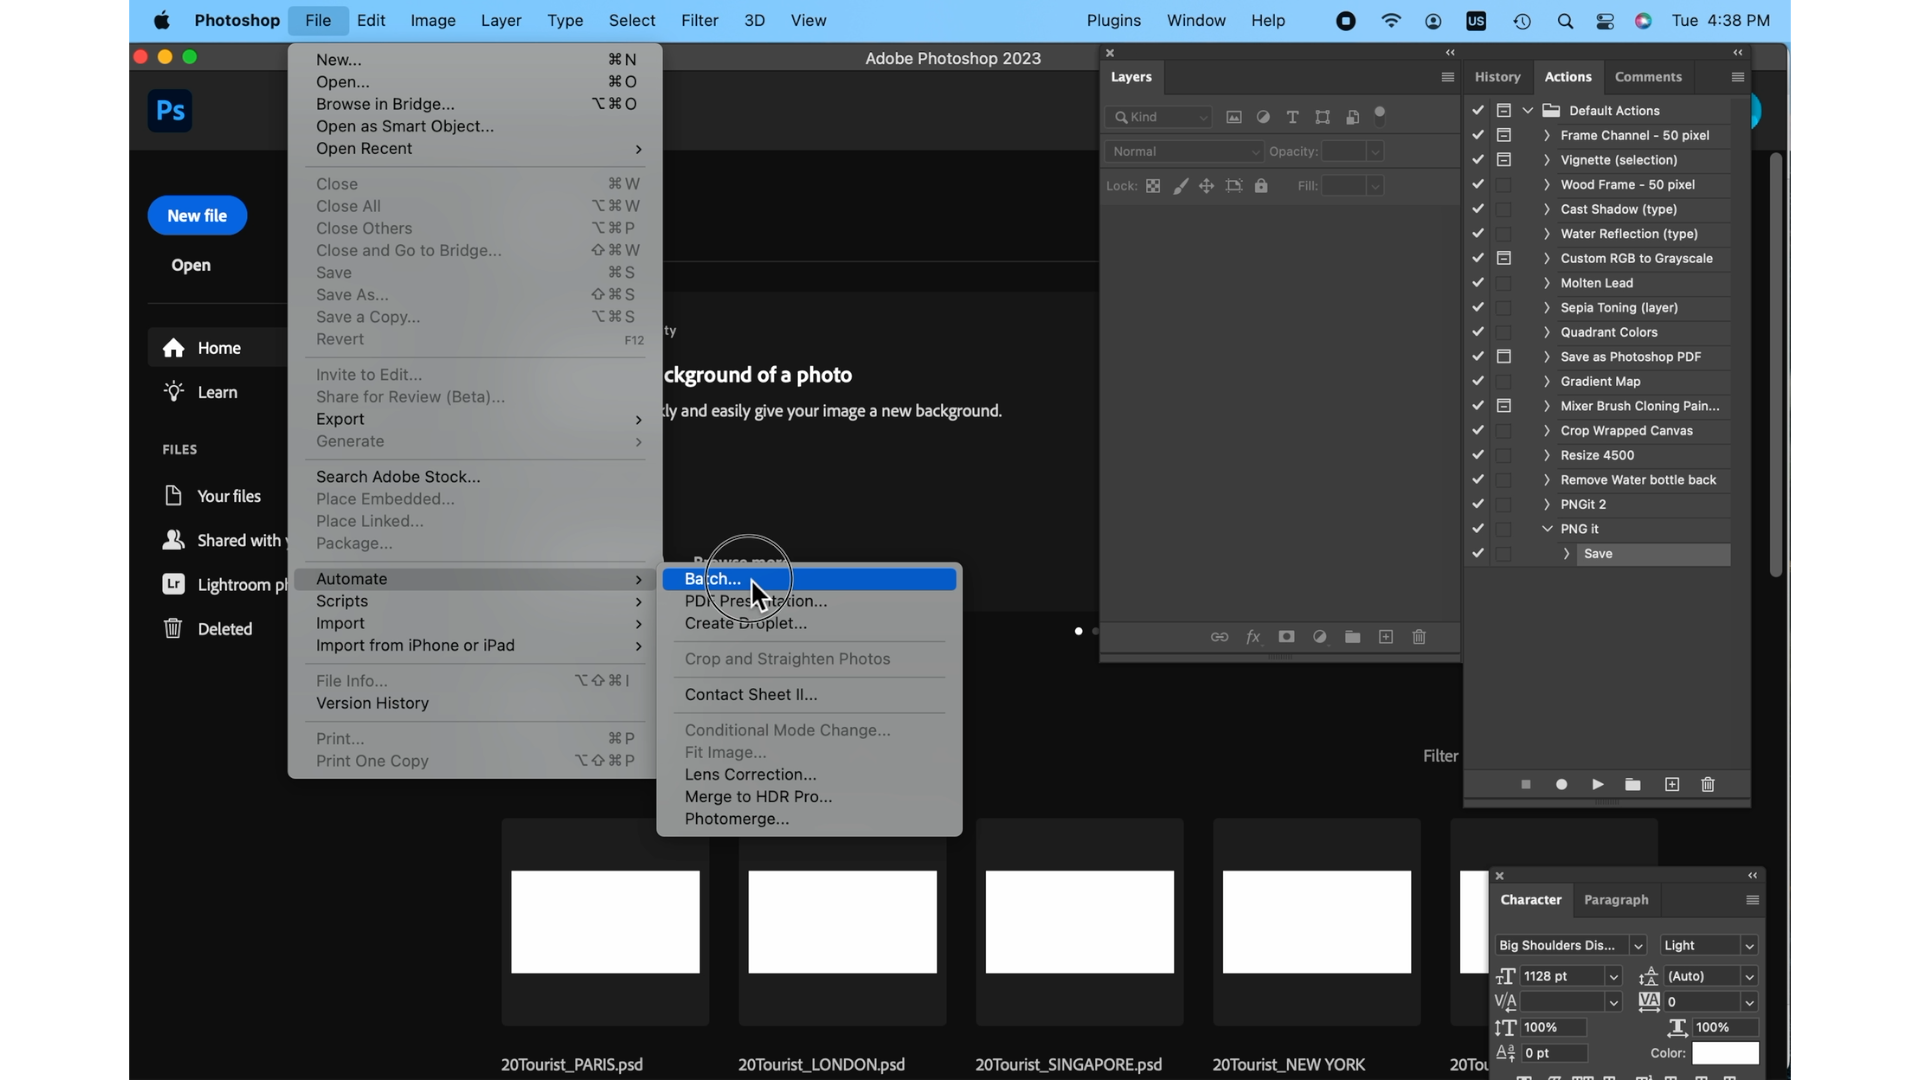
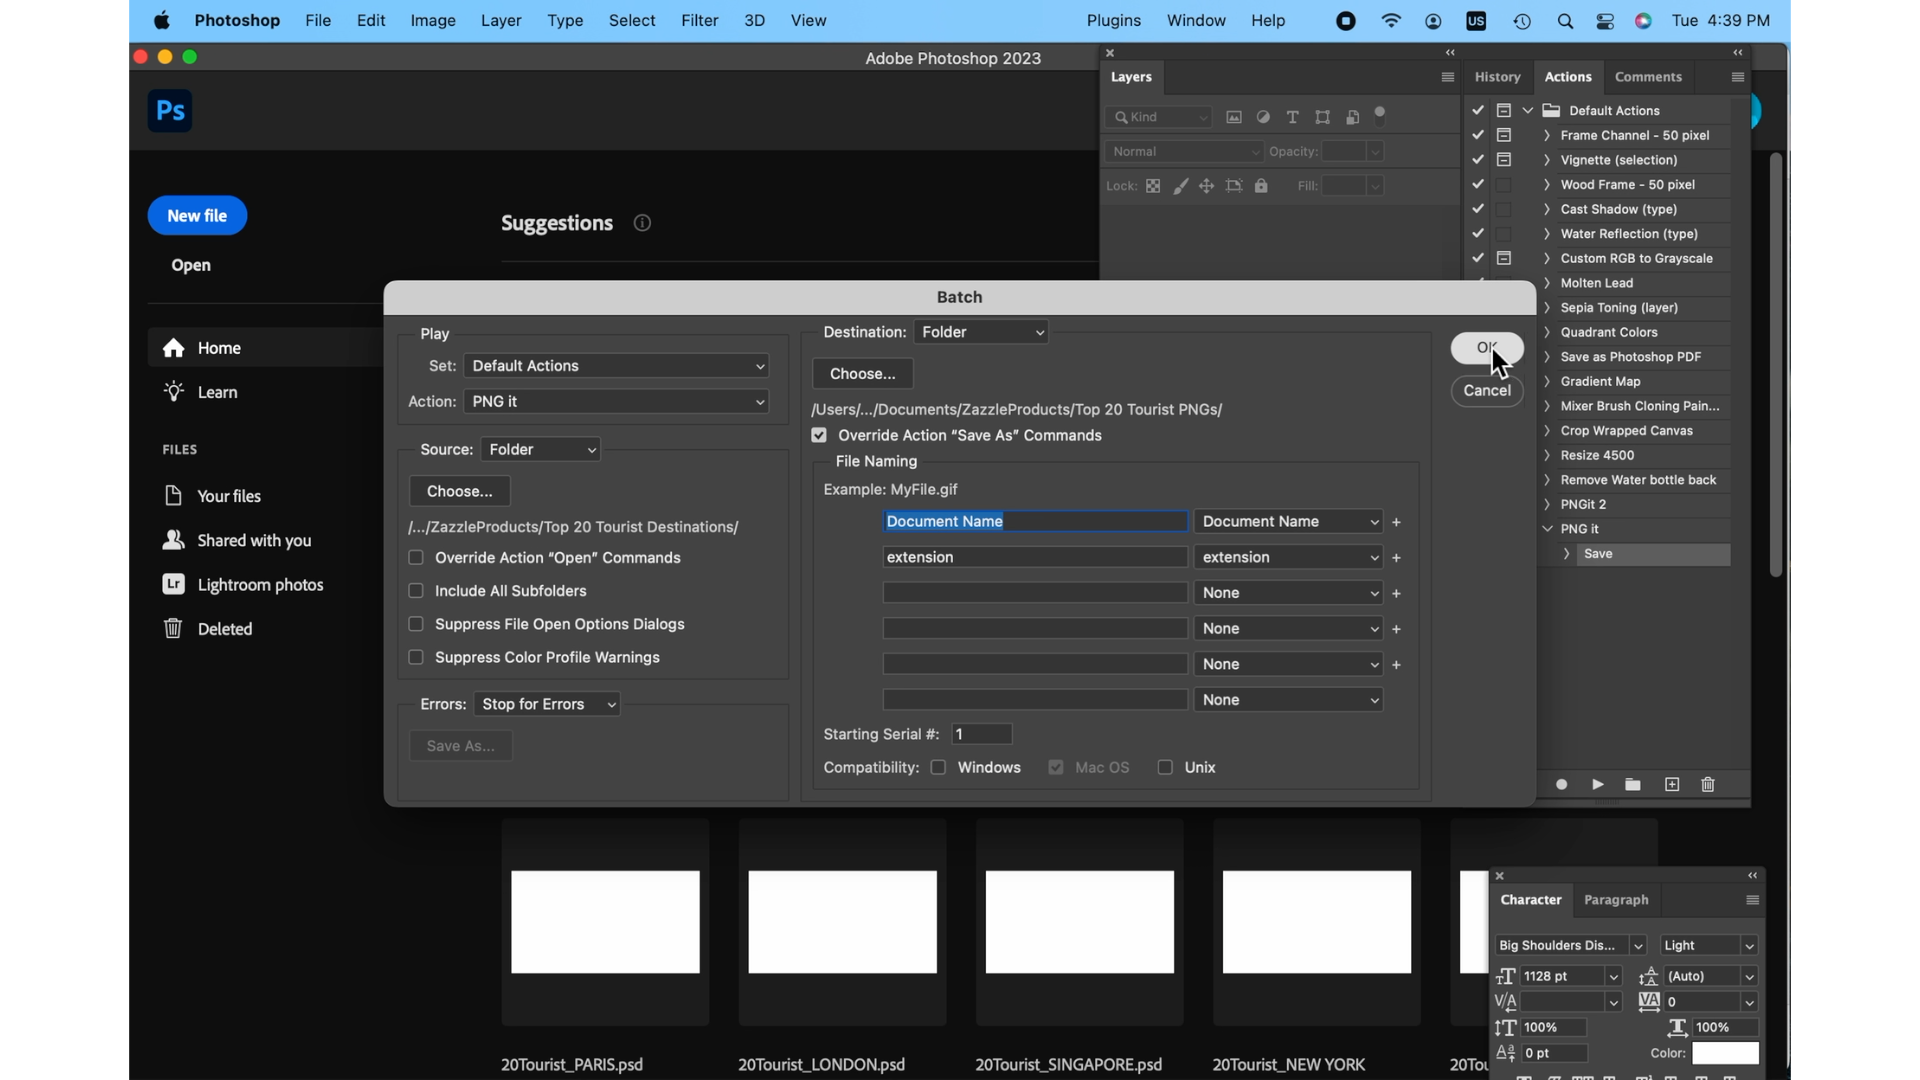
The Action is the newly created “PNG it”. Choose the folder of .psd files. Destination “Folder” (choose folder). Be sure “Overide Action “Save As” Cammands” is checked. OK
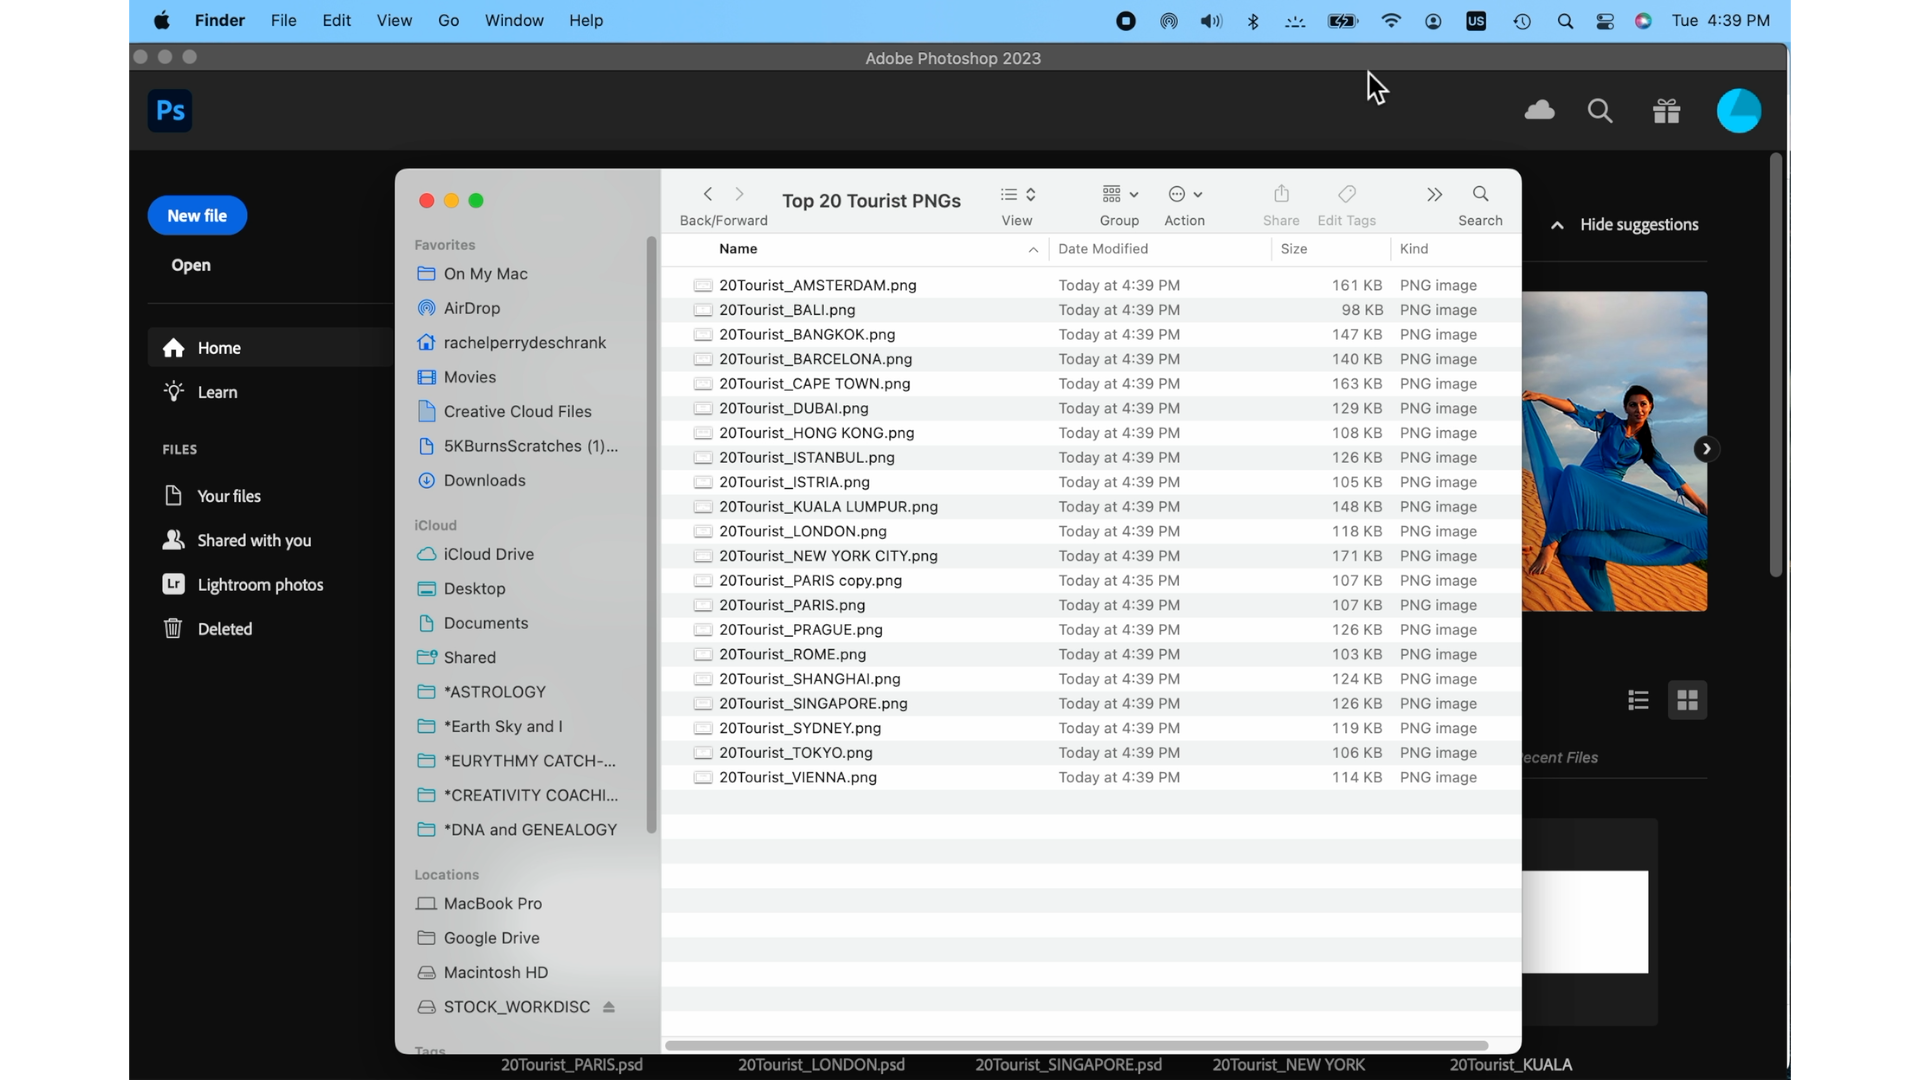
THis should be the final result. A folder full of png files ready to upload to all platforms.